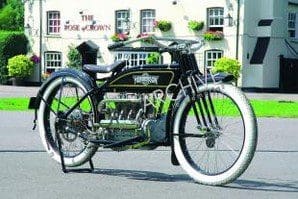
To the non-mechanically minded, our engines are of bizarre design. Strange castings, plates and pressing are fastened together, making endless joints, each with the potential to leak and fail. Then the precious moving parts are encased within this dodgy structure assembled to support the unit and keep in or out as appropriate fuel, gases, oil and water.
Leaks may be simply messy, but could also prevent an engine running and, in extreme cases, wreck it. A catastrophic engine leak could lead to total oil loss and seizure while when escaping fluid finds the back tyre – it always does! – grip can be lost and the hapless rider dumped on the road.
Throughout this feature, the subject under discussion is the engine. But seals are also found in gearboxes, carburettors, fuel line systems and electrical components.
Most joints commonly found within the engine are ‘static joints.’ These in turn break down into two main types – those with a separate seal and those without.
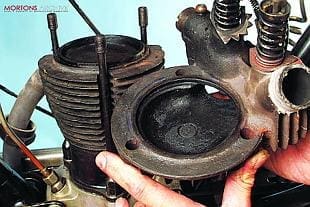 Mention engine case seals and we immediately think of gaskets, but ‘O’ rings and washers serve as seals too. Makers over the past century relied on a variety of materials with which to make their gaskets, washers, seals and rings including asbestos, card, cork, fibre, leather, metals (especially soft metals), paper, plastic, rubber and wood.
Joints without seals – often known as ‘face-to-face joints’ – have always been a part of engine building and still are today. For example, some modern motorcycle engines with horizontally split engine cases are of the face-to-face variety. However, today’s makers often use a jointing agent to ensure a tight seal.
Care over cleanliness
Work to remake a sound joint begins at the stripdown stage. Care over cleanliness, recovery of mating surfaces, gasket material selection, appropriate – if any – jointing compound and tightening of fasteners will make the job a good ’un.
Early engines relied on total loss oiling. By drip feed, hand or mechanical pump, oil is fed to the engine and lubrication is by ‘splash.’ Apart from lubricating the cylinder bore, big and little ends, oil finds its way to the main bearings, valve gear and/or timing chain cases from which, often, its only route of escape planned by the maker is onto the road. Despite the type of main bearing, plain with grooved oil ways or race type, there was often no scavenge system or oil return. Similar principles may have applied to the timing chest and valve gear lubrication. From these areas, oil loss is expected.
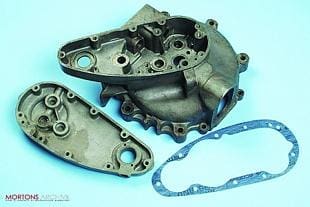 Many primitive four-stroke engines were designed with breather systems though not all were timed but, nonetheless, they relieved crankcase pressure. Later systems were more sophisticated. By minimising pressure build-up, less force was applied to engine joints, helping to ensure joint remained oil tight. Limited oil vapour will find an escape through engine breather systems, leading makers and motorcycle rebuilders to trail breather pipes to the rear of the motorcycle or under the engine for them to vent onto the road.
While limited oil escape through the breather pipes is permissible, excess is not. Not all regard the venting of breather pipes onto the road acceptable and for road racing, all vent pipes must feed to collecting tanks. Often, breather pipes are fed into plastic bottles fastened to the frame, though a check of appropriate regs will confirm the approach needed to secure a particular scrutineers’ pass.
Unless components have distorted, joints should need no more than cleaning with solvents to ready them for reassembly. Unfortunately, many sound joints have been damaged by poor stripdown methods. Any approach to separating joints involving prising apart with screwdrivers, tyre levers, chisels and the like could cause serious damage. Projects we buy often sport damaged joints and some have stood unloved for decades, necessitating the need for mechanical ‘help’ to part component mating faces.
Like many tasks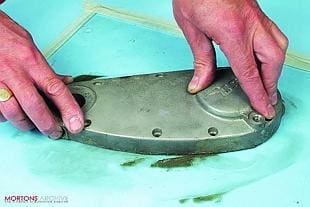 within motorcycle rebuilds, the separation of joints involves a series of approaches of increasing aggression but decreasing desirability. Once the pulling, tugging and tapping with a rubber mallet has failed, try heat. Ideally, once drained of fluids, 250 degrees in a redundant domestic oven may soften the joint. Or if no oven is available, play the flame of a butane gas torch evenly around the joint to soften it.
Unfortunately, in the pre-silicone days, paste-type jointing compounds or even paints or glues were used. The paint, glue or paste was applied to both sides of gasket before the joint was fastened. Few solvents work in these circumstances but the joint will often separate using a combination of heat and the careful driving of thin craft knife blades into the joint, lengthways with the gasket. By working round the joint, a series of blades slowly eased into the joint forces the cases slightly apart, enough to split the joint but due to the blades’ thin profile, cases aren’t broken or distorted. Any damage to mating surfaces is minimal. Suggested mating face recovery procedures are illustrated with accompanying photographs.
Advice and instruction
These procedures involve solvents, ‘sharps’ and gas torches, and any makers’ advice and instruction must be heeded. If we deviate from these instructions, it’s our decision and risk. Additional warnings apply too as some engine cases are egg-shell fragile, while long narrow cases such as timing chest covers may snap with excess force. We recently worked on a vintage Norton engine that had suffered such past damage to the inner timing chain case – luckily both parts had been retained and a local engineer saved the day by alloy welding, reprofiling and blasting to original finish. Externally, the repair is totally invisible and an example of a good craftsman’s work.
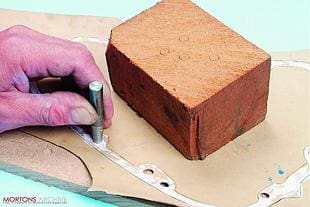 We all know we should be working on clean engines. Although the blasting of cases is more for cosmetics than the well being of the unit and not essential, the removal of dirt, gasket fragments and jointing compounds along with oils and other deposits from cases is. Soaking mating faces in solvents often softens gaskets and jointing compounds enabling them to be scraped free with a plastic scraper (glass fibre kit paste applicators are ideal). Some favour craft knife or safety razor blades used flat to cut free reluctant material – again not a recommendation to be encouraged as their use without holders is against makers’ instructions… but it works!
A final clean with methylated spirits removes any last traces of silicone jointing compound. Petrol, cellulose thinners or white spirit may be needed for paint and older paste-type sealers. Once clean, check all fastening threads and oilways are free of loose sealers, gasket flakes, deposits and corrosion. Often a run through with an appropriate tap cleans threads, while oilways may need an appropriate drill passed though them followed by a flush with solvent and a blow out with an airline.
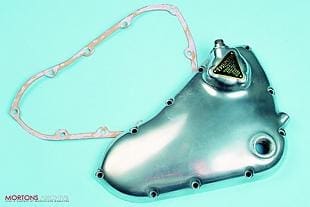 While some flimsy cases appear distorted when checked on a flat surface such as a sheet of plate glass, they often pull true on even fastening. In such cases, the condition of the joint surface is important and, so long as cases aren’t excessively distorted, a sound joint is achievable. But with scored surfaces and distorted rigid cases, refacing of mating faces is essential, and we can achieve much remedial work in the home workshop. Extreme damage may require the planing of jointing surfaces, a job good engineering shops can undertake. However, as often 0.010in and upwards of material is removed, check to ensure method of face recovery is possible.
End float of shafts, gears and crankshafts is often dependent on the fit of cases. In some circumstances, any material removed can be replaced by the use of thicker gaskets or a lesser thickness of shim to maintain the maker’s end float recommendation. If this is your first experience, seek expert advice before proceeding. View the image gallery for step-by-step instructions.
Guidance notes
• Many gaskets are thin fragile shapes in paper. Delicate they may be but they are extremely successful at blocking oil ways. Before fitting any gasket, check all holes for fasteners, ensure dowel pegs and oil ways are in appropriate positions and punched plugs are removed. Only one is needed to block an oil way, and seizure can occur in seconds.
• Some gaskets, such as primary drive covers, may look reversible or suggest by their appearance that they’ll fit either way up. With unfamiliar components, it’s sound practice to carry out a loosely fastened dry build to check gasket positioning. Once happy, mark gaskets with pencil.
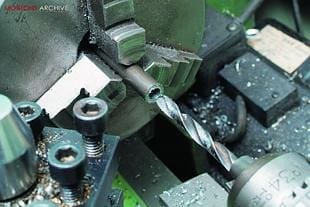 • We’re lucky today if we find original motorcycle manufacturers’ gasket sets. Mostly, we rely on pattern parts and the vast majority are excellent. But, if trying a new supplier for the first time, it’s worth taking a few minutes in the workshop checking materials used and to ensure thicknesses are appropriate. Reference to original workshop manuals, if available, will help but, as a rough guide, thin paper serves for many crankcase oil sealing applications: thicker paper, cork, rubber, synthetic card for flat mating face primary drive covers, medium paper for cylinder base and thin or medium paper for rocker gear covers. Similar applies to synthetic sheet gasket paper replacement materials.
• Refer to maker’s instructions – if available – for tightening sequences. If not, invent your own diagonal sequences. First tighten all fasteners to finger tight, then light spanner, medium spanner and finally estimated degree of tightness. Some maker’s manuals also advise torque settings.
• Many common engine and other component cases are made of aluminium devoid of additives to limit heat induced expansion. As these aluminium cases warm to operational temperatures, they can expand at more than twice the rate of their fasteners, which in effect further pulls up fasteners and tightens joints. A few current fastener-makers supply fasteners which, they state, expand at the same rate as aluminium; however, past motorcycle makers and mechanics allowed for this variance of expansion when tightening fasteners and advising torque settings.
• On a light note… Autojumble buys of original gaskets sets often include one or two crumpled paper gaskets. If not torn, they are easily ironed flat using a domestic iron on a low heat setting. This fills the house with pleasant aromas and works well on bank notes too…
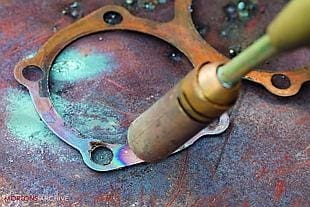 •Re-use copper and some copper covered CAF (Compressed Asbestos Fibre) type cylinder head gaskets are intended for re-use – anneal first. It’s sound practice for new solid copper gaskets too and recommended by some suppliers. Although we’re tempted, it’s often unsound to re use paper gaskets – but if they’re undamaged and unavailable or hard to make, well…
• Modern classics – including a 1966 Honda C77 I recently finished – have a horizontal metal-to-metal crankcase joint. Rules of checking mating surfaces apply and a light smear of silicone ensures and oil tight joint.


