Jim Algar was galloping on with his restoration on a Norton twin. And then he discovered that his cylinder head has… shrunk!
What next? Time, I think, to add the crowning glory to the now installed engine; the cylinder head. Ah, the infamous Norton cylinder head. Gather round, children, and I’ll tell you a story…a story not for the faint of heart. ‘Fasten your seat belts; it’s going to be a bumpy night.’ (Name the movie, win a prize.) [Jim is providing the prize…TP]
In Chapter 7 of this saga, I mentioned the tasks needed to bring my somewhat knackered cylinder head back to life, and I’m holding the result in my hand, with repaired rocker spindle bushes, new valve guides, and a nicely cosmetic bead blast finish, all courtesy of the mechanical elves at Norvil.
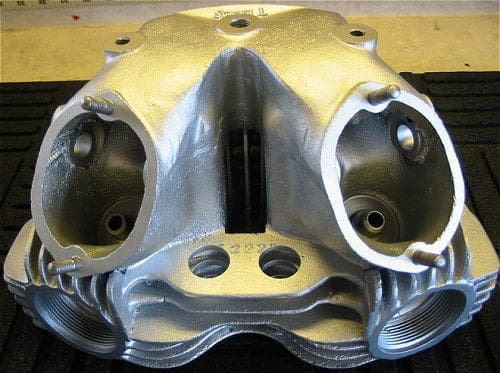
Time to start putting all the bits and bobs back in, in preparation for putting the head back on the engine. I had intended to go with new valves, but changed my mind; the valves are in good shape after a cleaning up, and while I have no problem spending money when and where required, these valves are obviously not that old, certainly replaced in a previous engine rebuild.
So, the valves slip nicely into the new guides. Well, three of them do… and one doesn’t. Which one? Why, the one that lived under the rocker running on the spindle with all of the slop, of course (Chapter 7, again). It must have been either infinitesimally bent or pounded just slightly out of round; either way, it refuses to go into its new guide.
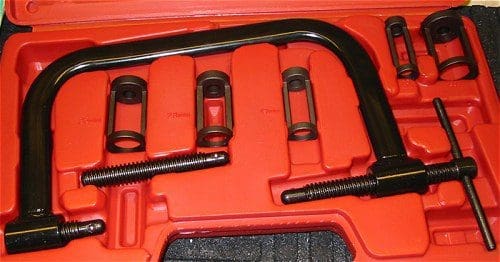
All right, short hiatus while one new valve is ordered. When it arrives, all goes smoothly, as valves, springs, collars and collets willingly submit to the rather nice valve spring compressor tool that I picked up on eBay for the agreeable price of $30 (£15). This tool shows up on eBay and other tool sites a lot, and it’s a nice bit of kit for the price. I’ll guess it’s Chinese, but that has to remain a guess, since it arrived with absolutely no clue as to its country of origin. I’d happily recommend it if you’re in need of such a tool.
So the head is ready to go back on the engine. Now, as any Norton owner will happily (?) tell you, this can be a fiddly task, fraught with risk. This is down to what Frank Westworth aptly described as ‘the incredible casting complexity of the Hopwood twin’s cylinder head.’
There are no separate rocker boxes; they’re cast as part of the head. Worse yet, they’re almost fully enclosed, with just alloy caps above the outer ends of the rockers for access to the adjusters. The problem is that the inner ends of the rockers, which feature a ball end that must mate with and seat in cups on the pushrod tops, are hidden within the casting, and not readily visible, or particularly accessible. So as the head is lowered onto the barrel, care must be taken to ensure that the pushrods are, in fact, mating properly with the rocker ends.
Even if a visual inspection – which consists of peering hopefully into the dark recess of the head through the adjustment openings – shows them to be, it is all too possible for one or more of the pushrods to slip out from under the rocker end as the head is torqued down, with the result that the pushrod gets trapped between the rocker and the wall of the casting, effectively immobilizing parts which really ought to be free to move.
And how, you may ask, am I able to describe this potential problem so accurately?
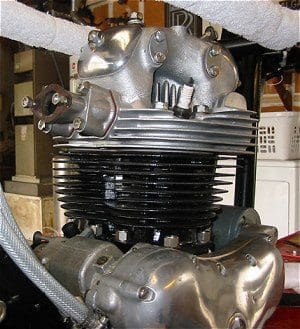
Yes, that’s right, live-and-learn time at the Algar garage… again. So off comes the cylinder head for another try, this time using a trick (thank you, Mick Hemmings) using elastic bands on the visible ends of the rockers to hold those ends up, and thus the inner ends down, lessening the chance of a pushrods popping out from under as the head is lowered and bolted into place. So, success; the head is back on the engine… not a task I’d care to repeat. To quote Frank W. again, ‘Mind you, if you want to view design insanity at its unlovely best, take a look at how the top end is held down on Mr Hopwood’s Dominator twin. Take a close look; there are fasteners everywhere; nuts run up into the head, down towards the crankcase; they hide away beneath the exhaust ports and under the carb. It’s a nightmare.’ ‘Tis indeed. But it’s done, so I won’t have to repeat that task, right? Wrong! |
Random Dominator stuff on eBay.co.uk |
Out comes the feeler gauge to set the valve clearances… whereupon I discover that I can’t get sufficient clearance, even with the adjusters backed out as far as they can go. In fact, one valve, even with the adjuster completely removed from the rocker, there’s no clearance; the rocker tip itself sits hard on the valve. How has this happened? Your first thought might go to incorrect parts; pushrods or valves (or both) that are too long. But no, they’re the correct parts. Incorrect assembly? Always a possibility, but I’ve double- and triple-checked everything.
Think, Algar, think!
Well… my cylinder barrel and cylinder head have both been refreshed by Norvil, and in each case the parts were skimmed to improve the barrel-to-head seal at the head gasket. And the valve seats were reground, which of course moved the valves up higher in the head. And this is a fifty-year-old engine; how many times have the exact same operations been done to it in the past, with the repeating result each time of losing some vertical adjustment available at the top of the valve train.
Hmmm… wonder what Les Emery at Norvil would say? At the other end of a international phone call, he says exactly that; that it’s quite possible, even likely, that my engine has ‘shrunk’ with repeated rebuilds to where I’m out of adjustment options… and out of luck?
Worry not, says Les, there are a couple of solutions. One is relatively easy but expensive; the other is relatively inexpensive, but requiring a lot more work. (Isn’t that always the way?).
Option 1 is a set of pushrods that Les offers that are meant for later Commandos, that just happen to be a tenth of an inch shorter than Dominator pushrods; they’ll drop right in and will restore all the adjustment room I’ll need. But they’re not cheap.
Option 2 is what Les calls a ‘steel compression plate’ that sits between the barrel bottom and the crankcase, and will lift the entire barrel/head assembly with the same result; adjustability restored. Not expensive at all, but of course it would require tearing the top of the engine back down to the point of pulling the barrel up and off the pistons so the steel plate can be installed underneath.
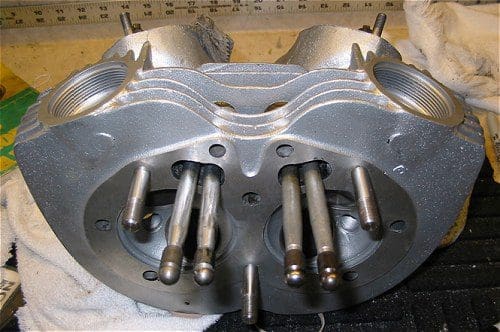
While I ponder these choices, a troll of various Norton message boards on the web raises another possibility; intriguing, possibly radical, but least expensive of all: shorten my own pushrods. So off comes the cylinder head (again!) and an examination of the pushrods suggests that it can, in fact, be done. The later Norton pushrods are aluminium, with pressed-on steel ends; a ball end on the lower end, and a cup on the upper end (that mates with a matching ball end on the rockers, as mentioned.) If one or the other of the steel end pieces can be removed, then that end of the pushrod body can be shortened by grinding, and the end then re-pressed on. Result? Shorter pushrods, and restored valve clearance.
Well, that’s the intention, and I’m willing to give it a try. New steel ball ends are available, so I order up a set of four. Cooling the pushrods in the freezer is followed by careful application of heat to just the steel ball end piece, and yes-off comes the end piece, with a little persuasion and mole grips (which is why I have the new ball ends to hand). Repeat three times, then it’s off to the grinding wheel to shorten the pushrod bodies a tenth of an inch-just like the items Norvil offers-then on with new steel ball ends. Result: shorter pushrods, and time to put the cylinder head on…again. (How many times, in total, did I have the head on and then off again? I’m not telling; I’ve got my pride, don’t you know.)
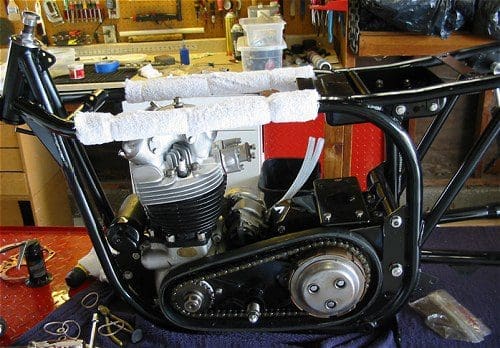
But at last it’s done. The head is on, I can set the valve clearances, and my engine is actually looking like… an engine. Quick, somebody, take a picture!
So what’s next?
Well, I must start a search for a painter. Google, anyone?
