Click on the image gallery for step-by-step images and captions.
Image captions
Picture one: To begin the stripdown I’ve removed the points cover from the right-hand side of the engine. Unlike later Japanese fours this is a chromed steel pressing. Removal reveals a conventional points set-up with two sets of contact breakers mounted on a common backplate. I’ve scribed a line on the backplate to reference it to the crankcase before removing its three mounting screws and lifting it away. Note the two condensers mounted below the points.
Picture two: Behind the points backplate is this auto advance unit secured to the end of the crank with a single central bolt. With the bolt removed the auto advance simply lifts away – note the oil seal behind it which is sandwiched between the crankcase halves. The auto advance unit comprises the points cam and two spring-mounted bobweights which, under centrifugal force, advance the ignition timing a few degrees as engine rpm increases. Unless it’s sticking or badly worn it can be left in one piece.
Enjoy more classic motorcycle reading, Click here to subscribe to one of our leading magazines.
Picture three: At the top of the engine this tacho drive cable is retained by a single screw, a method Honda seem to favour for all their instrument cable drives. Frequently these screws get overtightened and can be difficult to shift without damaging the surrounding casing. Sure enough, this one isn’t going to budge without a struggle, so I’m going to leave it for now and deal with it when the rocker cover is removed. Note the split outer on the cable – this will have to be replaced on the rebuild.
Picture four: Back to the plot, and the generator cover comes away from the front left side of the engine to reveal the alternator. Honda favour a five-wire alternator system, which means the engine cover carries two stators. This outer stator actually provides AC output to feed the charging system, and releases from the cover once three mounting screws are carefully removed. Note the generator rotor still mounted on the crankshaft.
Picture five:  This inner stator is actually the field coil which serves to energise the rotor by induction. Both stators can usually be left fitted inside the engine cover unless they require attention, but in this case I’m going to be sending the cover out for polishing, so out they come. The windings are delicate on the stators so I carefully wrap them up in some old bubble wrap and lay them aside before proceeding.
Picture six: The starter clutch is bolted to the rear of the generator rotor and will be accessible later, but for now I’m releasing the starter reduction gear by sliding out its central pin and laying it aside. This reduction gear connects the starter motor to the starter clutch, and gears down the drive to give the motor enough clout to spin the engine.
Picture seven: Moving back from the generator, I’ve removed the left rear engine cover to reveal the gear selector mechanism. Now I can unhook the selector claw from the end of the drum and lift it out complete with its return springs. The selector claw is welded to the gear change shaft, so this is the part you’d be replacing if you had a problem with the gear lever splines.
 Picture eight: This detent roller is next to come off. Its purpose in life is to click into the recesses round the edge of the selector drum, ensuring it stops in the right place and doesn’t under- or over-select gears. It’s also the bit that’s responsible for the click you feel with your foot when the gear engages correctly. Again, watch for any damage to the spring, but these on the Honda are pretty sturdy.
Picture nine: Next, this housing releases from the end of the gearbox layshaft. It carries an outrigger bearing for the shaft, and a spout to feed oil into the end of the gearbox input shaft. And that’s all that needs releasing from the gear selectors for now; I’ll have access to the selector forks and shift drum when the crankcases are split.
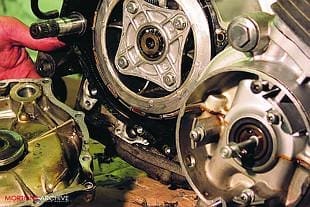
Picture 10: Back to the right-hand side of the engine, I’ve now removed the clutch cover to reveal the clutch itself. The outer cover carries the clutch release mechanism, which I’ll be examining later on. Honda clutches are subtly different from those found on other Japanese brands, and removing the four bolts and springs lets me lift out the whole clutch plate assembly in one piece.
 Picture 11: Getting the inner drum off is a little more tricky thanks to Honda’s preference for a castellated centre nut instead of the usual hexagonal type, and a special tool is needed to undo it. I’ve found it worth investing in a special tool for the job as it also fits so many other Honda models, but it’s easy enough to fabricate one from a piece of tubing ground to leave four pegs. Don’t be tempted to try to free the nut with a chisel as they can be quite tight, and one slip can terminally damage the inner drum.
Picture 12: Up to this stage it’s been easy to think I’m working on any common or garden UJM, but the clutch basket design is a reminder of the antiquity of the Honda’s design. While later bikes invariably have a cast alloy basket mounted on a roller bearing, this one is a complex-looking steel affair pressed on the splines on the end of the gearbox input shaft. Removing it requires a little care as it’s possible to damage the end of the gearbox shaft, but a tentative tug with a universal two-legged puller slides it easily off the shaft without a struggle.
Picture 13: Now I can turn my attention to the top end. Unbolting the cam cover screws and lifting off the cover reveals the world’s first mass-produced ohc engine layout; a real piece of engineering history. The single camshaft runs in two steel carriers bolted to the top of the head casting, in contrast to later designs which invariably had the cam bearings machined direct in the alloy of the head. Later designs were much simpler and cheaper to manufacture, and Honda were no doubt playing safe with this early layout. Note the tacho drive gear still captive on the underside of the rocker cover.
 Picture 14: Before starting to remove the camshaft and carriers, I’ve slackened off all the valve clearance adjusters. This will take the load off the valve springs and make it easier to manipulate the camshaft out of position. Then I can turn the engine over to get access to these two bolts which secure the camwheel to the camshaft, and slacken them off.
Picture 15: At the back of the cylinder barrel is this camchain tensioner assembly. I’ll need plenty of slack in the chain to release the camwheel, so I’m unbolting and removing the tensioner before starting to disassemble the cam and rockers. I always like to position the engine at 1 and 4 TDC before disturbing the tensioner, but as I’ve slackened off all the valve clearances there’s little chance of doing any damage if the engine is in the wrong position.
Picture 16: Now I’m removing all the rockers from their mountings. Each pair of rocker arms is retained on a spindle passing through the cam carrier casting. Removal of a single bolt on top of the cam carrier releases the spindle, which can be pulled out and clear to release the rockers. I’m marking all the rocker arms to make sure they go back in their original positions on the rebuild.
 Picture 17: Now I can remove the two camwheel bolts I slackened off at step 15, and drop the camwheel down on the camshaft. Two notches in the camwheel centre allow it to drop low enough to let me feed the camchain off the sprocket teeth.
Picture 18: Now I can unbolt and remove the four caps which retain the camshaft on its carriers, and lift the camshaft up and sideways out of the camchain. This whole procedure looks and sounds much more complicated than it actually is, and a little care and commonsense is all that’s required to dismantle the cam and rocker gear without inflicting damage.
Picture 19: The steel cam carriers are bolted down on the head with an assortment of studs and nuts. With all these removed the carriers lift up and off the head. I’ve replaced all the rocker arms, spindles, cam caps and studs in their original positions to make sure nothing gets mixed up later on. Incidentally, any lubrication problems will have adversely affected the cam and carriers, which have proved to be vulnerable to abuse. Consequently good second-hand replacements are tough to find, and can change hands at premium prices.
 Picture 20: I’ve removed six rubber caps covering the central head nuts, then unbolted and removed the cylinder head nuts in sequence before lifting off the head. It’s frequently a struggle getting the barrels lifted off any Japanese engine which has been subject to 30 years of road spray and corroded up the central mounting studs, but this one lifts away easily with barely a trace of corrosion on the studs, a tribute to Honda’s machined stud holes which have kept the studs shielded from the worst ravages of winter salt. If only all Jap fours came apart as easily as this one!
Picture 21:Almost ready to split the crankcases now, but first I’m removing this camchain tensioner roller assembly which has stayed in place around the camchain. The camchain is obviously worn, but there hardly looks to be any sign of the years of service the roller has given. This central pin slides out to release the roller, and the assembly can be unhooked from the chain.
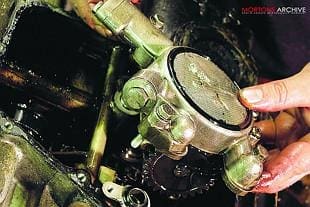
Picture 22: Before parting the cases I’ve turned the engine over and removed the sump. The oil pump then unbolts and pulls clear from the lower crankcase. And just look at that sump strainer gauze – almost spotless! All the signs are that this engine has been fastidiously cared for during its long and faithful service; regular oil changes certainly look to have paid off in terms of engine longevity.
 Picture 23: The lower crankcase half carries the layshaft and gear selector mechanism. Note also the spring-loaded slipper blade, which acts as a tensioner for the twin primary chains. You can also clearly see the main bearing housings for the crankshaft, each of which carries a split shell-type bearing.
Picture 24: With all the bolts released the lower crankcase lifts away from the upper, leaving the crankshaft and gear shafts in place. Here again the Honda shows the age of its design; most Japanese bike engines use a simple two-shaft transmission with an input shaft accepting drive from the clutch, then transferring drive through a gear pair to an output shaft driving a sprocket for the rear chain. On this bike the crank is linked to the input shaft by a pair of single row primary chains. A short output shaft carries the sprocket, and the two shafts are linked by an intermediate, or layshaft.


